Total Pageviews

Friday, August 12, 2011

Challenge Entry

Today I created a card to enter in a couple of weekly challenges on blogs that I follow. This is my first time entering a challenge at http://www.creativetimeforme.com/2011/08/throwback-thursday-challenge-episode.html. The challenge is to use a retired cricut cartridge http://cartridgelibrary.com/retired-cartridges/. The second challenge is at http://cricutcardzchallenge.blogspot.com/2011/08/cricut-cardz-challenge-87.html .
The challenge is called "Straight from the heart" using a heart that is not red or pink for a thank you card. The inside of card reads Thanks for your support. Here is my entry.....
Products used:
Yellow Cardstock DCWV
Peach Cardstock Coredinations
Patterned Paper Echo Park Little Girl Collection
Twinkle Toes Cricut Cartridge (hearts)
Mini Monograms Cricut Cartridge (I (heart) U)
White Gelly Roll Pen
ATG Gun
Peach Ink

Thanks for stopping by and checking out my project. Feel free to leave a comment or suggestion. Make a project and enter at the above posted blogs if you are interested. Have a great day!

Wednesday, June 29, 2011

Recent Projects

Hi all,
It has been over a month since my last post. We have been busy, busy this month with graduations, birthdays, fairs, etc... I have overcome a recent mojo block and have created a few projects I would like to share with all of you....Here we go......
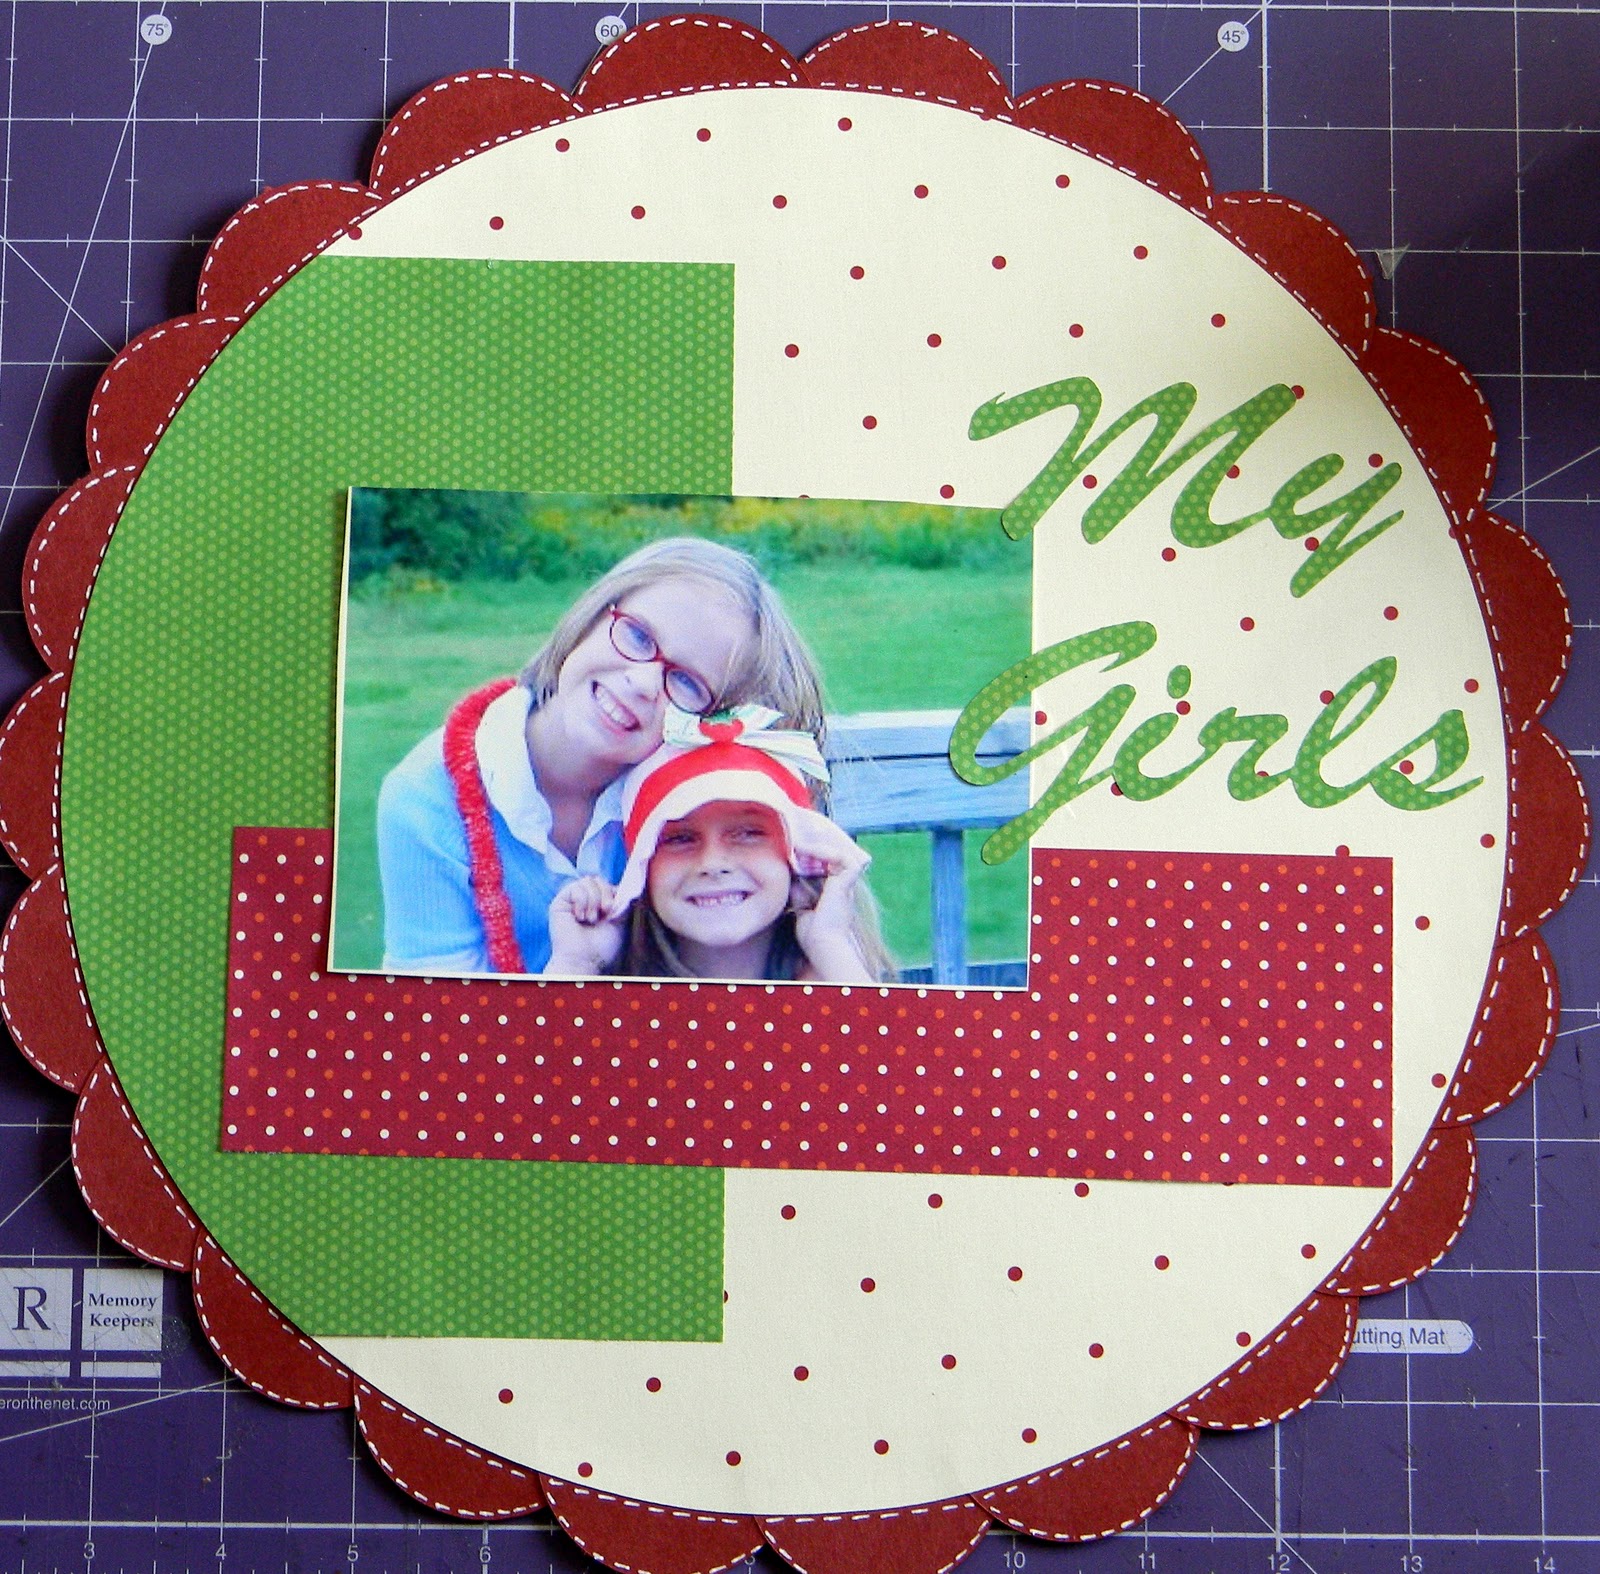
This layout highlights our family day at the Vermont Dairy Festival. This was the first year that my youngest daughter was tall enough to ride on the Tornado. She wanted me to ride along with them so I did...The base of this project is orange cardstock from DCWV. I am not sure which stack it came from because it was a loose piece. The striped piece of patterned paper came from the DCWV Indian Summer Stack. The orange patterned paper came from my scrap bin and I am unsure of who made it. The colorful polka dot paper is from My Mind's Eye Bright Dots stack. The banner stickers and the tickets are made by 3Birds. I used baker's twine from the Twinery. The larger pic of the ride is a standard 4x6 and the 3 accent phots are 3 3/4 squares. I really liked how this layout turned out. I am not a big fan of the color orange, but I thought that color helped the pics stand out really well.
           
                  Project # 2

This layout showcases my beautiful daughter as she gets her hair and makeup done prior to her 8th grade graduation in June. I will be working on another lo of her all dressed up soon and will post when done.
 This lo starts on cardstock from the DCWV Christmas Cardstock stack from a few years ago. The yellow patterned paper is from the K&Company Primary Designer paper stack. The orange cardstock is also DCWV that I punched with the Fiskars Apron Strings punch. The pink polka dot paper is from the My Minds Eye Bright Dots stack (love this stack). I cut the word Gorgeous using the Birthday Bash cartridge and I welded the letters and shadow letters together using my Gypsy. The chipboard pieces are from colorbok and I threaded them using baker's twine from the Twinery. The journaling card is also from colorbok, but the original from the Sticky Journal Stak was too small for me to use so I copied and enlarged it using my HP all in one photo printer. Rhinestones are from Darice. The shiny green border strips are from 3Birds Paper Trails collection. I love these photos of my daughter.
    That's all I have to share for now. Thank you for stopping by and feel free to leave a comment and let me know what you think...
Have a Great Day!!!!!

Saturday, May 7, 2011

National Scrapbook day Challenges

Hi Guys,
 Just a quick entry to post my entries for a few challenges over at http://www.mypinkstamper.com/..
She has quite a few different challenges to enter and you have until Monday I believe to enter! She has some awesome prizes.
Here is my first entry for the use a animal challenge.
I used the owl from Create a Critter and an owl stamp I got from the Joanne's dollar bin.

Here is my entry for the create a summer project challenge:

I cut out scallops from the Plantin Scoolbook cartridge and used the negative left overs from cutting it out to make waves. I used my gypsy to line up 8 inch welded scallops. I cut out a circle using the same cart and triangles from George for the suns rays. I crinkled up the circle and inked it up after with orange ink. I also die cut the tag using my gypsy from the wanderings cart.

The next challenge was to make a scrapbook lo
here is mine from Easter this year!

I used the Easter 2010 solutions cartridge for the green border and the eggs. I stamped the eggs with Peachy keen stamps Everyday Charcter Face parts. The chipboard is from a scrapbooking kit I ordered from HSN a couple years ago and the word eggs and one of the 'e' in Easter are from the Heidi Grace Designs raw chipboard set. The pp was scraps from my stash so unsure where they originally came from. The cardstock is Best Occasions from Walmart. Thanks for taking a peak at my projects and Best of luck to all who enter!

Monday, April 25, 2011

Florals Embellished Bookmark

It has been a while since I have posted a new project on my blog. I am still trying to get the hang of doing this. My crafting mojo has been minimal lately to say the least. I actually bought this cartridge over a month ago and made this project shortly there after but haven't downloaded my pics from my camera in a long time.

I used the butterfly image on page # 68. I love the details on the images on this cartridge. I used cardstock from a package I picked up from Staples. It is 65 # cardstock staples brand. I do not believe it is Acid free so I will only be using it for cards or other non picture paper projects.

I used my gypsy to set up the layers and to weld the base image together to make 3 butterflies in a line to create the length of a bookmark.
Here is how I set it up:

The butterfly had 6 layers including the base layer. I cut the welded base layer out of purple paper. I then set the layers up in different areas on my 12x24 mat so that each layer was a different color out of the 6 other colors I choose. (hope that made sense) I love using my gysy because it allows me to know exactly were the machine will cut and allows my to use scraps of any size.
Here is how I layed my paper out:


Here are the individual pieces after they were cut with my cricut:

You can see that all the shapes are cut out in different colors so all three butterflies will look different.
I used Scotch Quick Dry glue and a Zig 2 way glue pen to adhere all my pieces together.
Here is the finished project:


I did ink the edges of a few pieces and after I took the photo I added a bit of stickles inside the flowers on the wings. I love how this bookmark came out and plan to make more in the future. Thanks for stopping by and taking a peak at my project. Feel free to let me know what you think!
Have a great Day!

Sarah

Tuesday, March 1, 2011

Peachy Keen Stamps Critter Faces Sets

 I recently purchased a meduim set of Peachy Keen's Critter Faces stamps in the medium size. Theie website states that the faces are approximately 1 inch and "will fit critters or paperdolls cut in medium sizes." My definition of meduim sizes would be 3-6 inches for the animals on the Create A Critter cartridge. I was very excited to recieve my stamps and I immediately started cutting away the cute critters on this cart. After I cut my 1st owl @ 5 inches I knew I had the wrong size stamp set for my needs. The face was not big enough so my excitement faded a bit. So about a week later I ordered the same set in the Extra Large size and I recieved this package yesterday. This set is advertized as "faces are approxiamtely 1 3/8 inches and will fit critters or paper dolls cut in larger sizes. Faces will fit face size diameters of approxiamtely 2 1/2 to 3 1/4 inches." I did not raise my expectations of actual critter/doll sizes as I knew the medium size was not quite MY medium I did however expect them to be able to work with the 3-6 inch critters. I in no way want this post to discourage any potential Peachy Keen customers from ordering their high quality stamps this is just my opinion of the sizing and is in no way a negative attack of their products because I think they a high quality. I took pictures to compare sizes for people to make their choice of the size they may want to purchase.
The smaller kitty was cut at 3 1/2 inches and the larger one is cut at 4 1/2 inches. I think these sizes push the limits of these sets in terms of the face being to small for the cut.

The smaller koala is cut at 3 1/4 inch and the larger one is 4 1/4 inches.

The smaller turtle is 2 1/4 inch tall and the larger is 3 1/2 inches tall.
Thank you for stopping by and I hope I helped you get the information on sizing you may need prior to making your purchase of these great quality, cute stamps.. Have a Great Day!
 Sarah

Tuesday, February 22, 2011

Michaels & Walmart Haul Feb. 13th and Layout

Just wanted to share some recent purchases I picked up because nobody in my 'real life' can understand the excitement associated with the purchase of new supplies and a new lo I created.  I love this time of year because I always get a chance to pick up some new supplies that I have added to my want list from the previous year.
I got my first sets of Peachy Keen Stamps, super excited but I may have ordered the wrong size of the critter set. I went with medium but I think large would have been better considering the size of the cuts I usually make. I'll make it work or possibly place one more order, lol! I got Birthday Bash and Florals Embellished for cricut cartridges. Yeah! I can cross those two of my list.  I have wanted an embossing machine for a year now and was aiming for a cuttlebug, unfortuneately Michaels or Walmart did not have one. So being the unpatient crafter that I am I picked up the Sizzix Texture Boutique and a bunch of embossing folders that were on sale so I could not resist. The colorbok cardstock from Walmart ($5) will be used for cricut cuts being that it is black, brown & white. I find myself reaching for these colors on a regular basis now especially when using the Create a Critter cart. I am so happy I got a tripod. Hopefully my lo pics will come out better using this as oppose to my hand that seems to shake uncontrollably everytime I try to take a pic. Any other time no shaking what so ever. Figures, right? So enough with the I gots and on to a lo using my stash, that I entered in the Week #3 February Sketch challenge over at http://www.scrapbook.com/

 I created this Lo using Plantin Schoolbook for the circles. The scalloped piece behind large circle is actually 2 inch circles, cut in half and adhered evenly around the larger circle, which was cut using fit to page feature (11 inches) on my Cricut Expression. The large circle pp is from a K&Company Christmas Stack called BW Evergreen, the other pps are from DCWV and the cs is Recollections. I added faux stitching using a Gelly roll white pen. This is my got to technique right now. Every lo I have made gets the stitching treatment lately. To get the green dotted paper to layer perfectly, I put the 12inch by 4 inch scrap piece on the cutting mat and cut another circle the same exact size as the large one, I then just trimmed the top and bottom off to the size I wanted it to be and adhered it down. The other red pp was also a scrap I had it was a little larger so I just trimmed it down to the size I liked. For the title I used Scal2 (am new to this my husband got it for me for my birthday recently I love it so far). I love this photo of my girls. I oringinally had it on an 8 1/2 by 11 lo I created early on in my scrapbooking days but I thought it deserved a better presentation. Thank goodness I originally adhered it using a glue stick so it was half falling off anyway and was easy to take apart without any damage. I do not recommend using any type of gluestick unless you think you may want to take your lo apart in the future. Thanks for checking my blog. Please feel free to leave a comment and I will be back to post some los using my new scappy supplies soon. Have a great Day!!!!!

Sarah

Sunday, February 13, 2011

Recent Lo

I am trying to get into this blog more but I just haven't got my mojo back yet. I am working on it by joining challenges over at scrapbook.com and making myself do them. Thank you to all my followers as I know right now this is not the most exciting blog on the internet, but I will do better in the future I promise...
Here is my most recent lo that I entered in 2 challenges over there.
The sketch came from the weekly sketch challenge. They post a sketch there and give you a twist to add to your creativity. The twist this week was to use a punch which I did with the black scalloped border. The other challenge category this lo was entered in was the use your stash challenge. This challenge encourages you to use products you already have on hand and also gives weekly lo guidelines with a twist. This is actualy for their week 1 lo which required me to create a lo with me and someone/thing I love with a twist of using a stitched heart. I picked these pics of my daughters and I and added doodled stitching to the title.
The products I used to create this lo were my cricut expression and SCAL 2 for the scalloped corner in the background. The pink and white pp is from the DCWV ultimate stack. I love this stack and the SCAL 2 program which is new to me but I already love it.. The title was cut out using the Birthday Bash cartridge at 2 1/2 inches. I doodled the stitching using a gellyroll pen. All the cs is from DCWV. The ribbon is burgaundy and from Joann's store. The green border strip and the black chipboard heart are from Colobok. I made the journaling paper using the quick form app on my printer. I decided on the color scheme with the help of http://www.colorschemedesigner.com/. This website is awesome. if you find yourself stuck trying to figure out which colors to use check out that site. I have it bookmarked and check it often. Thanks so much for visiting and I promise to see you soon. I got a bunch of new goodies recently and plan to create some great projects real soon!

Friday, February 4, 2011

Create a layout in 30 Mins.....

I haven't updated my blog in over a week because my birthday was on Wednesday and I have been busy, busy, busy....So today I thought I would share a lo I did for a challenge over at SB.com and it also falls under the 52 challenges I said I would do on this blog. The challenge at scrapbook.com was to create a single photo lo and I added the extra challenge of making it in 30 mins or less. I did so by designing the whole lo on my GYPSY and using pp and cardstock out of coordinating stacks made by DCWV. Here it is..
I created this lo using gypsy wanderings, mini monograms and Plantin Schoolbook. I used the layers feature on the gypsy and set this lo up using 7 different layers. I started with the yellow background paper which is cut at 11.38 inches wide and 12.08 inches tall. The 2nd layer was the striped scallop cut at 10.57 inches wide and 12.31 in height. Next I used the gypsy wanderings for the striped bracket looking accent under the title and that was cut at 3.49 inches wide by 2.96 inches tall.Layer 4 was the first mat under the bracket shape cut at 3.58 inches w and 3.45 inches h. The next mat was 3.97 w by 3.69 h. I did these before the yellow curved square so I would know how big to make this shape and still fit the title block and show the background. Layer 6 is the yellow mat under the gingham paper cut from Mini monograms cart and it was cut at 8.27 w by 10.29 h. The gingham red paper also from Mini cart was cut at 8.88 w by 11.16h. I used Plantin Scoolbook for the Title and the mat for the title and got the inspiration for it from a sticker I had. The border strip is from Martha Stewart Crafts. I used multiple mats to make these cuts and just cut one layer at a time. Having the whole lo planned out on my gypsy really helped speed up the process of gluing the pieces down which sometimes when making a lo I can struggle with this for days. Thank you for stopping by and checking out my creations. I hope you like it and that the directions are clear if you would like to recreate a similar lo for your scrapbook.... Have a great Day!

Sarah

Thursday, January 27, 2011

Create a Layout Using a Handmade Embellishment

This is the scrapbooking challenge I choose for this week. It was really fun to create my own embellishment. I didn't want to just cut out a cricut shape and use that. I decided to cut out heart shapes from patterned paper and see what other shape i could make with them. This is what I came up with...
All hearts were cut from Plantin Schoolbook. The sizes were 1 1/4 inches, 1 inch and 3/4 of an inch. I inked the edges of all the hearts and layered two with foam flowers. The blue border strip was cut from Home Accents Solution Cartridge. All 3 heart flowers have brad centers. Since I have a ton of eyelets and never use them I decided to use them on this page to add interest by threading them with baker's twine. I cut slits in all four corners of the pink cs and slid the corners of the black cs in the slits to add interest. I love the mixture of the different patterned papers (DCWV) I used on this layout.

I also put two hidden journaling spots on either side of the photo using the mats to hold them. One is under the pink mat and pulls out to the left while the other pictured ablove is under the orange mat and pulls out to the right. I haven't added any journaling yet because I want to get my children's perspective of hanging out with their buddies. The title is raw chipboard I purchased from HSN by Paper delights. I love this chipboard set (i ordered 2) it has many different alphabets and shapes that can be altered in so many different ways. You will see many of these chipboard pieces on my los to come. These pieces on this lo I just painted to incorporate all the colors of the different pp I used. Thanks for stopping by and taking a peek. Any comments would be greatly appreciated. Have a great Day.

Tuesday, January 25, 2011

Color Challenge # 84 from scrapmaster's paradise

I made this card for the color combo challenge over at Scrapmaster's paradise Blog. The colors were Pale Plum, Rose Red and Wild Wasabi from Stampin up but if you don't have stampin up paper use something similar so that is what I did. Here is my card:
I used the Birthday Cakes cartridge to cut out the butterfly at 2.5 inches. I only attached the butterfly to my page by it's body and bent the wings up a little to add dimension. The border strips I made using a Fiskar punch, I also curled these up for dimension as well. I matted the butterfly with black cardstock to ground it to the card and added faux stitching with my Inkssentials Opaque white pen.
 Thanks for looking! Have a great day.

Monday, January 24, 2011

Birthday Card

Hello all today I have a birthday card I made this weekend.
I used my gypsy to weld the scalloped shape on mini monograms cut at 9.87 inches to make the card base. The sentiment is from plantin schoolbook cut at 1 inch as well as the circle cut at 4.09 inches. The cupcake is from sweet treats cartridge and is cut at 2.22 inches. I used Donna Dewbury Extreme glitter paint to add sparkle to the cupcake and button. I also added brads in the button holes instead of floss. I really like how this simple card came out. Thanks for looking!

Saturday, January 22, 2011

Cards for Abused and Neglected Children

I have joined a team of talented, caring cardmakers to make cards for abused, neglected and battered children. I came across a thread over at sb.com and decided to join this group.
Here are the basics: The woman that collects the cards we make is Rhonda Towe. This is her third year doing this special project for these kids. She is part of an organization that runs a camp called Royal Family kids Camp and it is in the US and all around the world. I guess the one she is involved with is in the state of Georgia. Everyday at camp the kids receive cards from their counselor and other staff members. This is were we come in. It wouldn't be possible for the kids to receive these cards without caring people giving their time and creativity to make and donate these cards. The 1st year and 2nd year over 1000 cards were donated to this cause.
If you would like to participate the 'rules' are:

any size card you want to make is ok, but best if they are standard card size or smaller

envelopes are not needed as the cards are placed in the childrens cubbies with their names written on the back

sign your name or your sb.com screenname in small letters on the back of your card

Mail cards anytime between now and mid June 2011 to:
                                                              Rhonda Towe
                                                              PO Box 583
                                                              Morrow, GA 30260
Cards can be any theme, boy, girl, or neutral for either sex. other themes can be princess, prince, sports, animals, floral, popular charcters, etc..

They also have an 'Everybody's birthday' so birthday themed cards are great as well.
They seem to get more girl cards than boy cards so try to include a boy or neutral card in your donation as well.

Spread the word about this wonderful project through your blogs as well. The more people that get involved the better.

Here are a few examples of the cards I have made so far.


They are all standard size cards 5 1/2 by 4 1/4 inches. the images were all cut from the Create A Critter cricut cartridge. I printed the sentiments from Microsoft Office 2007 and matted them with cardstock. The background papers are from my scraps shoebox so I am not positive on manufacturers. This project is an awesome way to use up some scraps and it makes you feel good knowing you might help brighten a child's day!!! Thanks for looking. Feel free to comment and let me know if you plan on participating....

Friday, January 21, 2011

Celebrate The # 7

This challenge was a number based challenge. I choose this one because I had a bunch of pics to scrap about my youngest daughter's 7th birthday party. I choose to make it a 2 page spread because of the amount of photos I had.
I choose to use the word seven instead of the number because it just looked better to me. There is a total of 16 photos on this layout that have been organized by what they are of. The rows are labeled decorations, Games, Cupcakes and Presents. I did my journaling on the computer using Microsoft Office 2007 by making a text box pink and the text white. I cut my title from Plantin schoolbook cricut cartridge at 1 1/2 inches using DCWV pink and purple cardstock. The cupcake is from the Sweet Treats cartridge and is cut at 4 inches I used Darice rhinestones as sprinkles to add some bling to this page. Thanks for looking. Feel free to comment.

Sarah

52 More Scrapbooking Challenges

I bought this book a while back and love it. Since this is my first attempt at having a blog I figured I could use this book as inspiration and post my interpretations to the challenges in this great book. I will post one challenge per week and my interpretation of said challenge. I am not sure about the whole blog thing and this will give me a theme to start with until I find my own way in the blogosphere of scrapbooking. Who knows I may really enjoy doing this and post more projects only time will tell. I would love any feedback that anyone wants to leave. I hope to make new friends in the coming months.... Stay tuned for my first project!!!